Kettlebell Swing Biomechanics: Hip Hinge Physics for Maximum Power

Yes4All Vinyl Coated Cast Iron Kettlebell, 5-100 LB for Strength Training
The kettlebell swing is one of the most explosive movements in functional training, yet it is frequently misunderstood and mis-taught. Most fitness enthusiasts treat the kettlebell swing as simply "swinging the kettlebell hard," but in reality, the success of this movement depends entirely on a precise biomechanical mechanism: the hip hinge. Mastering the physics of the hip hinge is the first step in understanding kettlebell swing exercise science and the key to maximizing training results.
The hip hinge is a flexion-extension movement pattern with the hip as the fulcrum. Its core characteristics are threefold: first, hip-dominant -- the hip is the primary driver of movement, not the knees or lumbar spine; second, neutral spine -- throughout the movement, the spinal angle remains relatively fixed and does not participate in the primary flexion-extension; third, load distribution at the hip -- most of the tension is borne by the hip extensors (gluteus maximus, hamstrings), not the erector spinae of the lower back.
Understanding these three foundational concepts is the first step to mastering kettlebell swing biomechanics, and the core criterion for distinguishing correct hip hinge patterns from incorrect knee-dominant squat patterns. Over a decade of hands-on coaching, I have seen countless trainees develop lower back pain or achieve poor results from kettlebell swings because they failed to grasp hip hinge technique. The root of this problem is not that the kettlebell swing itself is dangerous, but that trainees lack a proper understanding of the hip hinge as the core biomechanical principle.
1. Kinematic Analysis: The Four Phases of the Kettlebell Swing
The standard Russian kettlebell swing can be broken down into four precisely connected phases. Each phase has its own distinct biomechanical requirements and muscle activation patterns. Understanding these phases is the foundation of proper technique. Many coaches overemphasize "swinging hard" or "pulling the kettlebell higher" when teaching the swing -- this is precisely the root of incorrect technique. Proper instruction should start with understanding the biomechanical goal of each phase.
Phase 1: The Setup
Feet shoulder-width apart or slightly wider, toes slightly turned out (5-10 degrees) to create a stable mechanical environment for the hip joint. The kettlebell is positioned at the body's midline, roughly an arm's length away. The hips are slightly flexed, knees bent approximately 10-15 degrees -- the key here is that knee bend is minimal; the primary flexion comes from the hips, not the knees. The gripping arm stays straight, shoulder blades retracted and stable, creating a stable tension environment for the swing that follows.
From a biomechanical perspective, the goal of the setup is to establish muscle pre-activation. The glutes and hamstrings are in a mildly stretched state at this point, preparing for the stretch-shortening cycle that follows. Meanwhile, the erector spinae stabilizes the spine through isometric contraction, ensuring the integrity of the force transmission chain. This preparatory phase is critical in kinematics but is often overlooked by trainees -- many jump directly into the swing without first establishing proper tension structure.
Another critical element of the setup is the breathing pattern. Proper kettlebell swings should use diaphragmatic breathing in the setup position, drawing air into the belly rather than the chest. This helps maintain core stability throughout the swing. Coordination between breath and movement is one of the hallmarks of a high-quality swing.
Phase 2: The Descent
The kettlebell swings back between the legs as the hips flex further and the body's center of mass drops slightly. The key to this phase is the source of the kettlebell's momentum -- it comes entirely from gravity, not active muscular force. The glutes and hamstrings are in a highly pre-stretched state, the stretch reflex is activated, storing elastic potential energy for the hip drive in the next phase. A common mistake beginners make during this phase is letting the arms "pull" the kettlebell backward, which leads to shoulder fatigue and insufficient hip drive.
The descent typically lasts about 150-200 milliseconds, making it the longest segment of the entire swing cycle. The trainee should feel the kettlebell being pulled by gravity rather than actively applying force. During this phase, maintaining shoulder tension is critical -- arms straight and shoulder blades stable, ensuring the kettlebell becomes an extension of the body's kinetic chain rather than an isolated weight. A common error is depressed or shrugged shoulder blades, which breaks the integrity of the kinetic chain and leads to shoulder discomfort.
Phase 3: The Hip Drive
This is the core biomechanical moment of the entire kettlebell swing. The hips rapidly extend as the hip extensors (primarily the gluteus maximus and hamstrings) contract concentrically, generating tremendous hip drive force. The knees remain slightly flexed during this phase -- this is a critical technical point, because excessive knee extension shifts load to the quadriceps and weakens the hip drive effect.
The kettlebell swings forward and upward under the inertia of the hip drive, rather than being "pulled" up by the arms. The force transmission chain starts at the hips, passes through a neutral spine, stable shoulders, and straight arms, ultimately reaching the kettlebell. Any loss of force at any link in this chain reduces swing height and explosive power. From a kinematic perspective, the hip drive phase lasts approximately 80-120 milliseconds -- this is the time window in which the hip extensors produce maximum power output. Athletes can generate power output equivalent to 1.5-2.5 times their body weight through this phase.
The timing of the hip drive is the most critical technical element. The drive should begin as the kettlebell approaches the lowest point of the swing, not when it is already moving downward. Driving too early causes the kettlebell to drift backward; driving too late turns the swing into an arm pull. The correct timing feels like "meeting" the kettlebell rather than "chasing" it.
Phase 4: The Top and Recovery
The kettlebell swings to approximately chest height (standard Russian swing) or roughly head height (American swing). At this point, the hip, knee, and ankle joints should be near or on the same vertical line, forming a complete kinetic chain. Every joint in the body is transmitting and distributing the kinetic energy generated by the hip drive.
As the kettlebell begins to descend under gravity, the trainee must control the descent through appropriate hip flexion rather than letting the kettlebell free-fall. This control phase re-activates the eccentric function of the hamstrings, further reinforcing the neuromuscular adaptation of the hip hinge pattern. At the top position, many trainees unconsciously hyperextend the lumbar spine (anterior pelvic tilt), which increases lower back stress. The correct approach is to maintain a neutral hip and spine position, with a slight posterior pelvic tilt that is not excessive.
2. Deep Dive: Torque-Angle Relationship in the Hip Hinge
One of the most important biomechanical findings in kettlebell swing research is that the hip extensors produce maximum active contractile torque at a hip joint angle of approximately 90-120 degrees. This finding is crucial for understanding how to maximize swing power and also explains why many trainees hit plateaus in strength development -- they may focus on increasing weight while neglecting the torque-angle relationship, a foundational biomechanical factor.
Torque Fundamentals
Torque is the product of force and its moment arm, determining the potential for rotational movement. In hip joint motion, the torque produced by the hip extensors depends on two factors: the force generated by muscle contraction and the moment arm of that force relative to the hip joint's axis of rotation. When the hip is in a slightly flexed position (the swing's lowest point), the hip extensors are at the optimal position on the length-tension curve -- the muscle is neither overstretched to the point of losing contractile capacity, nor excessively shortened to the point of being unable to generate maximum tension. At this position, the torque output capacity of the hip extensors reaches its peak.
As the hip extends toward neutral, torque output capacity gradually increases. At full hip extension (approximately 180 degrees), the hip extensors' torque typically reaches its maximum. However, a critical contradiction exists here: maximum torque position does NOT equal maximum power output position. This contradiction is at the heart of understanding kettlebell swing biomechanics and represents a key cognitive gap between recreational trainees and professional athletes.
In-Depth Analysis of the Power Peak Window
Power is the rate of doing work, defined in biomechanics as the product of force and velocity. For the kettlebell swing:
P = F x v (force x velocity)
In hip joint motion, power output depends on two contradictory variables:
- Torque magnitude: increases with hip extension angle, peaking at full extension
- Contraction velocity: decreases as hip angle increases, approaching zero at full extension
This means that when the hip is at the maximum torque position, muscle contraction velocity is near zero, and power output is also very low. Conversely, when the hip is at the position of highest contraction velocity, torque output is at its minimum. This contradiction explains why pure "strength training" does not necessarily improve swing performance -- strength gains that do not translate into faster hip drive speed cannot effectively increase swing power.
Sports science research has found that the peak power output of the hip extensors during the kettlebell swing occurs at a hip joint angle of approximately 110-130 degrees (slightly hyperextended position), with the kettlebell's forward velocity at approximately 3-5 m/s and a time window of approximately 80-120 milliseconds. This power peak window is about 30-50 degrees ahead of the maximum torque position.
The practical implication of this finding: hip drive speed and timing matter more than raw strength. A technically skilled athlete, even using a lighter kettlebell, can produce greater power output through faster hip drive. Conversely, a very strong but technically rough trainee may lose significant power during the swing due to improper hip drive timing.
Training Strategies to Optimize Power Output
With an understanding of the power peak window, trainees can adopt targeted strategies to improve swing performance:
- Speed Training: Emphasize hip drive speed under low loads to establish faster neuromuscular activation patterns
- Timing Awareness: Focus on sensing the lowest point position during the kettlebell swing and triggering the hip drive at the right moment
- Ballistic Training: Utilize the stretch-shortening cycle effect, transitioning rapidly from the pre-stretched position to concentric contraction
3. EMG Activation Analysis: How Muscles Work During the Swing
Modern sports science uses surface electromyography (sEMG) to quantify muscle activation during movement. Through this technology, we can objectively understand the true involvement of each muscle group during the kettlebell swing rather than relying on subjective feel. This has significant implications for understanding movement quality, designing training programs, and preventing sports injuries.
Gluteus Maximus -- The Engine of the Movement
The gluteus maximus is the most important muscle in the kettlebell swing and the most highly activated. As the largest and strongest single-joint muscle in the human body, the gluteus maximus plays the central role in hip extension. EMG research data shows:
| Movement Phase | Activation Level | Function |
|---|---|---|
| Swing Low Point (Pre-Stretch) | 80-120% MVIC | Stretch reflex preparation |
| Hip Drive (Peak) | 200-300% MVIC | Primary driver |
| Kettlebell Descent | 40-60% MVIC | Eccentric control |
200-300% MVIC (Maximum Voluntary Isometric Contraction) is a remarkable figure. This means that during the hip drive phase, gluteus maximus activation reaches 2-3 times maximum voluntary contraction capacity, far exceeding that of traditional hip-dominant movements like deadlifts and squats. This high activation level is unique to the hip hinge pattern -- it stems from the distinct biomechanical demand placed on the hip extensors to contract rapidly while producing high power output during the kettlebell swing.
For trainees, this data means: if you do not feel glute fatigue after kettlebell swings, your technique likely has issues. The glutes -- not the lower back or thighs -- should be the primary force source.
Hamstrings -- The Dual-Function Muscle
The hamstrings play a dual role in the kettlebell swing: working synergistically with the gluteus maximus as part of the hip extensor group, while simultaneously stabilizing the knee joint as knee flexors. Their EMG activation data is as follows:
| Movement Phase | Activation Level | Function |
|---|---|---|
| Swing Low Point | 100-150% MVIC | Stretch reflex + hip extension pre-activation |
| Hip Drive | 120-180% MVIC | Synergistic hip extension |
| Kettlebell Descent | 60-80% MVIC | Eccentric control |
The high activation level of the hamstrings explains why the kettlebell swing is an excellent exercise for developing hip power, while also effectively improving the strength balance between hamstrings and quadriceps -- a key factor in preventing knee injuries. For athletes who frequently run or cycle, the kettlebell swing is an outstanding choice for strengthening hamstring function.
Erector Spinae -- The Spinal Stabilizer
The erector spinae primarily functions to stabilize the spine and prevent excessive flexion during the kettlebell swing, rather than serving as an active driver. This is fundamentally different from the active contraction pattern of the erector spinae in movements like squats and deadlifts. EMG data shows erector spinae activation throughout the movement at only 40-80% MVIC, primarily through isometric contraction (maintaining length while consuming energy).
| Movement Phase | Activation Level | Function |
|---|---|---|
| Setup | 80-100% MVIC | Spinal stabilization pre-activation |
| Throughout (Swing) | 40-80% MVIC | Isometric stabilization |
The low activation level of the erector spinae is an advantage of the hip hinge pattern -- it means the spinal stress from kettlebell swings is relatively manageable. For individuals with a history of lower back issues who wish to train under protection, correct kettlebell swing technique is more forgiving than many traditional exercises. However, this does not mean there is zero stress on the lower back -- using excessively heavy weight or incorrect technique will still significantly increase lower back loading.
Quadriceps -- The Supporting Actor at the Knee
The quadriceps show the lowest activation level in the standard kettlebell swing, at only 20-40% MVIC. This data once again confirms that the kettlebell swing is a hip-dominant movement, not a knee-dominant one. In the knee-dominant squat pattern, quadriceps activation typically reaches 100-150% MVIC or higher.
This finding is critical for understanding why many fitness enthusiasts feel quadriceps fatigue rather than glute fatigue after kettlebell swings -- this almost certainly indicates they are using a knee-dominant drive pattern rather than the correct hip hinge pattern. If you consistently feel soreness in the front of your thighs after each kettlebell swing session, this is a clear technical signal that you need to refocus on foundational hip hinge training.
4. Biomechanical Comparison: Kettlebell vs. Dumbbell Swings
From a hip hinge biomechanics perspective, kettlebells and dumbbells have fundamental differences in swinging movements. Understanding these differences helps trainees select the more appropriate training tool and explains why, in training that pursues hip hinge optimization, the kettlebell is generally the better choice.
Mechanical Differences in Center of Mass Position
A kettlebell's center of mass is located below the handle; when the kettlebell hangs, the center of mass is positioned directly below the grip. This "pendulum" geometry is the kettlebell's most distinctive biomechanical feature. As the kettlebell moves through the swing, the center of mass naturally follows the momentum trajectory -- the trainee does not need to "control" the kettlebell's balance; the kettlebell itself is a stable pendulum system. This property allows the kettlebell swing to focus more on hip drive without requiring additional energy to manage the kettlebell's balance.
In contrast, a dumbbell's center of mass is located in the middle of the palm, forming a rigid connection with the arm. In swinging movements, the dumbbell's center of mass position creates a fixed lever relationship with the arm, making momentum transfer more "rigid" and requiring greater forearm and biceps involvement to control the dumbbell's position. This rigid connection increases energy loss during momentum transfer, weakening the effect of the hip drive.
Differences in Hip Drive Efficiency
Due to the difference in center of mass position, the momentum generated by the hip drive in a kettlebell swing transfers more efficiently to the kettlebell. This is because the kettlebell's pendulum geometry allows kinetic energy to release naturally along the direction of the hip drive, whereas the dumbbell's rigid lever introduces more "loss" during momentum transfer. EMG research shows that, under identical swing technique, kettlebell swings produce approximately 15-25% higher hip muscle activation than dumbbell swings.
This difference becomes more pronounced at higher speeds. As hip drive velocity increases, the kettlebell's pendulum geometry advantage becomes more significant, while the dumbbell's rigid lever imposes more limitations. For trainees pursuing maximum power output, this difference can represent a 10-20% gap in training effectiveness.
Differences in Technical Demands
The kettlebell swing demands higher hip hinge technique. While pendulum geometry optimizes momentum transfer, it also means that any error in hip drive is reflected more directly in the kettlebell's movement trajectory. In comparison, the dumbbell swing relies more on arm strength -- even when the hip drive is not precise, the arms can partially compensate for momentum deficits.
This difference is a double-edged sword: the kettlebell swing requires higher technical proficiency, but the training effect after proper mastery is also superior; the dumbbell swing is easier to pick up, but the ceiling for hip hinge technique development is also lower. For beginners, this difference means the kettlebell swing requires more practice time to establish the correct technical pattern, but once mastered, the technique will be more robust.
5. Biomechanical Suitability Analysis of the Yes4All Kettlebell
The Yes4All Vinyl Coated Cast Iron Kettlebell offers a complete weight range of 5-100 LB, providing comprehensive progressive loading options for different training goals. From a hip hinge biomechanics perspective, this product has several noteworthy characteristics that make it a suitable choice across various training levels.
Biomechanical Advantages of the Handle Design
The Yes4All kettlebell's cast iron handle design offers several important biomechanical advantages for the hip hinge pattern:
- Handle Diameter: The moderate handle diameter keeps the forearm at a natural angle, reducing grip fatigue. During extended training sessions or high-repetition swings, grip strength often becomes the limiting factor, and a moderate handle diameter helps delay the onset of grip fatigue, allowing trainees to focus more on hip drive technique.
- Handle Length: Sufficient length supports double-hand gripping, which is critical for advanced movements such as the Turkish Get-Up. Many budget kettlebells lack adequate handle length to safely perform double-hand grip movements, while the Yes4All handle length meets the demands of these advanced techniques.
- Center of Mass Position: The kettlebell's center of mass sits below the handle, forming the classic pendulum effect that benefits momentum transfer during swinging movements. This is a key indicator for evaluating whether a kettlebell possesses good swing biomechanics.
The vinyl coating primarily serves rust protection and floor protection functions, which is especially valuable for home training environments. The vinyl coating protects floors from scratches, prevents the kettlebell from rusting, and extends product lifespan. From a biomechanical perspective, the vinyl coating does not affect the core mechanical properties of the kettlebell swing but may slightly alter the handle's friction coefficient -- this may require some adaptation time during high-intensity training.
Weight Range and Training Phase Matching
The 5-100 LB complete weight range offered by Yes4All can meet hip hinge technique development needs across different training phases:
| Weight Range | Application | Hip Hinge Technique Fit | Recommended Training Goal |
|---|---|---|---|
| 5-15 LB | Hip hinge technique learning, rehab training | Optimal: suitable for technique refinement | Technical introduction, neuromuscular adaptation |
| 20-35 LB | Strength endurance, metabolic training | Excellent: suitable for intermediate-advanced | Conditioning development, fat loss training |
| 40-55 LB | Strength and power training | Good: suitable for advanced trainees | Maximum strength, power development |
| 60-100 LB | Competitive kettlebell, extreme challenges | Professional: requires solid technical foundation | Competitive training, extreme challenges |
6. Common Technical Errors and Corrections
Even with an understanding of hip hinge biomechanics, many trainees still commit common technical errors in practice. Below are four of the most frequent technical errors and their systematic correction methods.
Error 1: Knee-Dominant Pattern (Squat Pattern)
Symptoms: lower back dominant force production, kettlebell does not swing high enough, knees visibly travel far forward past the toes, lower back fatigue rather than glute fatigue after swings. These are all classic signals of a knee-dominant drive pattern. Beginners, due to insufficient hip mobility or underdeveloped neuromuscular patterns, often default to knee-dominant drive.
Correction: First, set the kettlebell down and re-establish the hip hinge movement pattern under no-load conditions. Use the wall awareness drill -- stand with your back to a wall, feet about 15 cm from the wall, push the hips back to "touch" the wall (maintaining a neutral spine), feeling the stretch in the hip flexors and pre-activation of the hip extensors. Before establishing the correct movement pattern, use lighter weights (5-10 LB) and focus on awareness drills rather than rushing to add weight.
Error 2: Excessive Spinal Flexion (Rounded Back)
Symptoms: excessive spinal flexion during the swing (rounded back), erector spinae fatigue rather than glute fatigue after swings, head looking down at the swing's lowest point rather than maintaining a neutral spine. These symptoms indicate that the erector spinae is absorbing force that should be produced by the hip extensors. This error typically stems from insufficient core strength or a misunderstanding of neutral spine positioning.
Correction: Imagine a wall behind you and maintain a sensation of the chest being up and forward, avoiding the chest dropping downward. Another effective cue is "chin tuck" -- maintain stable head position throughout the swing, looking forward rather than down. At the swing's lowest point, focus on pushing the hips back rather than "folding" the chest downward. If this problem persists, regress to no-load hip hinge drills until the correct pattern is established.
Error 3: Insufficient Hip Drive
Symptoms: kettlebell is swung primarily by the arms rather than hip drive, limited swing height, body forms a "T" shape rather than a vertical line at the kettlebell's highest point. These symptoms indicate that hip drive force is not being effectively transmitted to the kettlebell. This error is common among trainees who overemphasize "pulling" the kettlebell.
Correction: Focus on the sensation of "pushing the hips forward" rather than "pulling the kettlebell higher." An effective drill is the band-resisted hip drive -- place a resistance band around the hips, drive the hips forward against the band, focusing on the contraction sensation of the hip extensors rather than arm pulling force. In each swing, wait until you genuinely feel the hip drive force transmitting to the kettlebell before considering the swing complete.
Error 4: Excessive Arm Involvement
Symptoms: forearm and biceps fatigue after swings, grip strength becomes the limiting factor, arms show visible bend during the swing. These symptoms indicate that the arms are absorbing force that should be produced by the hip drive. This error is particularly common among trainees with weaker grip strength.
Correction: Keep the arms straight throughout the entire swing (shoulder may have slight flexion but the elbow must remain locked). Imagine the arms as ropes that only connect the kettlebell to the shoulders, with all of the kettlebell's momentum coming from the hip drive. If grip strength becomes a limiting factor, lifting straps may be used, but dependence on straps should be gradually eliminated once technique stabilizes. With consistent training, grip strength will progressively adapt to the demands of the kettlebell swing.
7. Training Program Recommendations: Progressive Hip Hinge Development
Below are kettlebell swing and hip hinge development programs for different training phases. Each program is designed based on biomechanical principles to ensure movement performance improvement alongside technical development.
Beginner Program (8 Weeks): Technical Foundation Phase
Weeks 1-2: Hip hinge awareness training (bodyweight, 3 sets x 10 reps)
Goal: Establish the correct hip hinge movement pattern, distinguishing between hip drive and lower back drive. Training emphasis is on movement quality, not weight or rep count. The goal at this stage is to retrain the brain in correct movement patterns and discard faulty movement habits formed in daily life.
Weeks 3-4: Light kettlebell swings (5-10 LB, 3 sets x 12 reps)
Goal: Introduce light external load while maintaining correct technique. Focus on the sensation of hip drive, progressively building neuromuscular adaptation of the glutes. If technique degrades during this phase, immediately regress to the previous phase's training.
Weeks 5-6: Standard kettlebell swings (15-20 LB, 4 sets x 15 reps)
Goal: Establish the complete four-phase swing movement pattern, increasing load to strengthen hip extensor power output capacity. At this stage, you should be able to maintain neutral spine and hip dominance throughout the swing. Adding 1-2 training sessions per week can accelerate technique internalization.
Weeks 7-8: Kettlebell swing + hip drive focus (20-25 LB, 4 sets x 12 reps)
Goal: Reinforce hip drive technique awareness, using relatively heavier loads while staying within technically perfect range. At this stage, you should clearly feel glute-dominant force production rather than lower back dominance. Some video analysis can be introduced at this phase to correct subtle technical deviations.
Intermediate Strength and Power Program (8 Weeks)
Weeks 1-2: Kettlebell swings x 20 reps (25-30 LB, 4 sets x 20 reps)
Goal: Establish metabolic adaptation for high-repetition swings while reinforcing hip hinge technique endurance. Technique should be automatic at this stage, maintaining correct form even at high rep counts. High-rep training helps build neuromuscular endurance.
Weeks 3-4: Single-arm kettlebell swings (20-25 LB, 3 sets x 15 reps per side)
Goal: Introduce asymmetric loading, address left-right strength imbalances, while improving shoulder stability and core anti-rotation capacity. Single-arm swings demand higher technical proficiency and greater core engagement. This training can reveal left-right imbalances.
Weeks 5-6: Kettlebell swing + squat combination (30-35 LB, 4 sets x 12 reps)
Goal: Combine kettlebell swings with squats, developing hip power transfer capacity in compound movements. This combination is particularly effective for sport performance enhancement. The squat following the swing should produce a sensation of further glute activation.
Weeks 7-8: Explosive kettlebell swings (35-40 LB, 5 sets x 10 reps)
Goal: Maximize hip drive power output, using relatively heavier loads while focusing on hip drive speed. Training at this stage should produce a genuine sensation of "hip explosion." Adequate rest between sets is essential to ensure power output on every rep.
8. Conclusion: The Hip Hinge -- The Scientific Key to Kettlebell Training
The kettlebell swing is a hip-dominant, full-body explosive movement whose core biomechanics lie in precise hip drive technique. Through understanding hip hinge mechanics, the power peak window, and EMG activation patterns, trainees can more efficiently unlock the exercise science potential of this movement.
Key Takeaways:
-
Hip drive is the core: The kettlebell's momentum comes from rapid hip extension, not arm swinging or lower back dominance. This is the primary criterion separating correct from incorrect technique.
-
Torque and power peak window: Maximum power is produced at a hip joint angle of approximately 110-130 degrees, not at the maximum torque position. Understanding this contradiction is key to optimizing training results.
-
Gluteus maximus is the engine: With 200-300% MVIC activation, it is the most efficient force source in the hip hinge movement. Training effects should manifest primarily in the glutes, not the lower back.
-
Technique before weight: Before mastering hip hinge technique, pursuing heavy weight will only reinforce faulty movement patterns. Once incorrect patterns become ingrained, correction becomes far more difficult.
-
Kettlebell over dumbbell: For trainees pursuing optimal hip hinge biomechanics, the kettlebell's pendulum geometry is the superior choice. This decision should be made early in training.
-
Yes4All full weight coverage: The 5-100 LB range supports progressive training from beginner to professional levels, suitable for hip hinge technique development across different training phases. This weight range is sufficient for the vast majority of training needs.
Master hip hinge biomechanics, and you hold the scientific key to kettlebell training. Whether pursuing sport performance enhancement, fat loss and body composition improvement, or functional health, the hip hinge is the foundational core of kettlebell training.
This article is based on sports science literature, RKC/StrongFirst certification standards, and third-party evaluation data. All technical recommendations should be implemented under the guidance of a qualified coach.
Yes4All Vinyl Coated Cast Iron Kettlebell, 5-100 LB for Strength Training
Related Essays
Kettlebell Swing Biomechanics: Hip Hinge Physics for Maximum Power

The Engineering of the Combo-Machine: Leg Press vs. Hack Squat Biomechanics

The 7-Degree Difference: How Biomechanics Is Reinventing the Smith Machine for Safer, Stronger Lifts

The Unseen Science of Your Home Gym: Why Your Squat Rack is an Engineering Marvel

The Unseen Engineering in Your Home Gym: A Deep Dive into the Physics of Fitness

The Unseen Engineering in Your Home Gym: From Structural Mechanics to Biomechanics

The Soul of the New Machine: Unlocking the Science Behind the Modern Functional Trainer
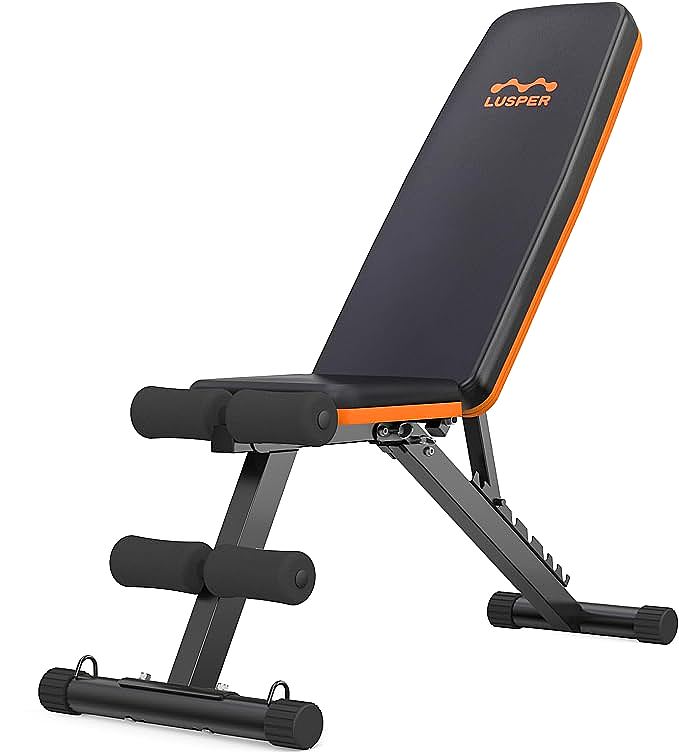
Lusper Weight Bench: Your Ultimate Home Gym Solution for Strength Training
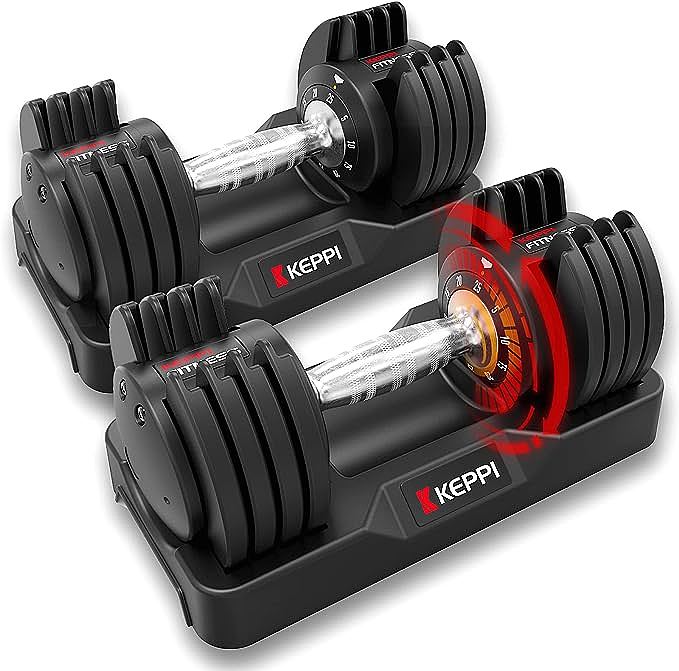
Keppi Adjustable Dumbbells Set - Convenient and Space-Saving Home Gym Addition
